
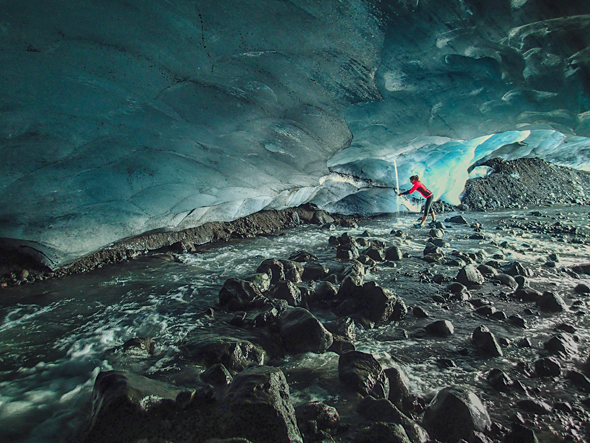

Ultrarunner Rory Bosio explores an ice cave in Iceland; Photograph by Tim Kemple
See Tim Kemple’s previous photography tips >>
Beginner and amateur photographers ask me often for photography tips. As image creators, we are always learning, but there is one piece of advice I always come back to. The biggest mistake I see amateur photographers make is photographing with the sun behind their backs.
Gasp … I know you thought I was going to share something uber-secret and surprising. But in a lot of ways this is a HUGE trade secret. The truth is that the quality of light itself is only part of the equation in creating great photographs.The other half is your position relative to the sun (or light source). When I am on commercial assignments I am shooting into the sun or with the sun 90 degrees to my subject the majority of the time.
Think of it this way: When you are shooting with the sun behind you—be it morning, noon, or night—your entire frame is filled with direct light. If it helps, picture the sun as a bright on-camera flash. You see very little shape or definition in the landscape because there is a distinct lack of shadows, just as when you have a flash mounted right on top of your camera. But when you move that light away from the lens, the environment takes on shape because you now have a combination of both light and shadow. That’s the trick to the best landscape and environmental photographs, the perfect balance of light and shadow.
Some tips for shooting into the sun:
- Learn your camera system so you can shoot as under exposed as possible while still keeping visible information in your shadows.
- Keep your lenses clean of dust and dirt because it’s more likely to be visible in the photograph with this type of lighting.
- Use the lowest ISO possible on your camera to maximize dynamic range (the range of information between pure black and pure white). The more the better!
- Use the sun flare to add depth to the image.
- Experiment with fixed lenses that have fewer elements and are less susceptible to lens flare.
Getting the Shot
In this photo of ultratrail runner Rory Bosio in a glacial cave in Thorsmork, Iceland, the sun was setting off in the distance behind us as we approached the glacier. We had spent a soggy day looking for hiking locations to photograph and the arrival of the sun had us excited. The light was beautiful, but when I pulled out my camera it looked very flat and ordinary. It’s amazing how different a scene can look in person compared to on a camera. After some test shots scrambling around outside the mouth of the cave, I realized that what the images were lacking was definition and shape. I needed shadows—so I needed to move my position relative to the setting sun.
Now, it’s not the safest thing, nor would I recommend it, but my search for shadows led me inside the glacier. As I came around and looked out the mouth of the cave I saw a completely new scene than I had moments before. The rocks, the water, and Rory were all clearly defined by the backlight that was bouncing in the cave from the setting sun.
The environment around us was exciting and dangerous at the same time. I could tell I was in a place I didn’t want to be for long–the creaking sounds, running water all around and the warmth of the sun didn’t seem like a good combination. I positioned the camera just above the raging stream to get as much depth in the foreground as possible and placed Rory on the side of the frame so that she stood out from the background. As I dialed in my settings I imagined the whole cave crashing down on top of me. I thought to myself, “At least when they find me, they can say my last photograph was a good one!”
The camera loved the balance of light and shadow in the frame as I exposed for the highlights (knowing I would have to lighten up the image in post-production) and quickly captured the shot. After only two frames I felt like we had taken enough risk and we hurried out of the cave. I knew we had a great shot in the bag and no rescue was necessary.
While it may go against traditional thinking, shooting into the sun or with the sun at an angle into the camera creates immense depth and shape when capturing outdoor photographs. With some practice you learn the best conditions and settings for your equipment, but it doesn’t require anything overly fancy. This image of Rory was captured with a relatively inexpensive point-and-shoot camera proving that knowledge of light and shadow doesn’t discriminate.
 This photo was taken with the Olympus Tough TG-2 iHS camera.