
Automation dream comes true. These little guys are awesome and small!
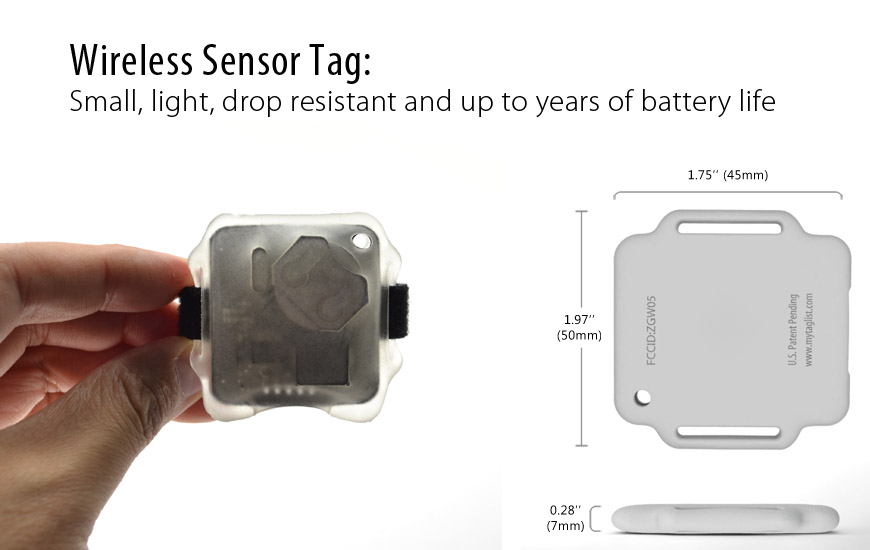
So What are Wireless Sensor Tags?
These little sensor tags are motion based sensors. So you setup one on the door and arm it then when the door is moved (also it has temperature, and battery status) the sensor will report back to the tag manager a little box connected to the internet. Now the company Cao Gadgets LLC makes these great sensors and apps for the iPhone and Android phones as well as a Web interface to setup manage and control the sensors. Like any sensor it is only the beginning now what?
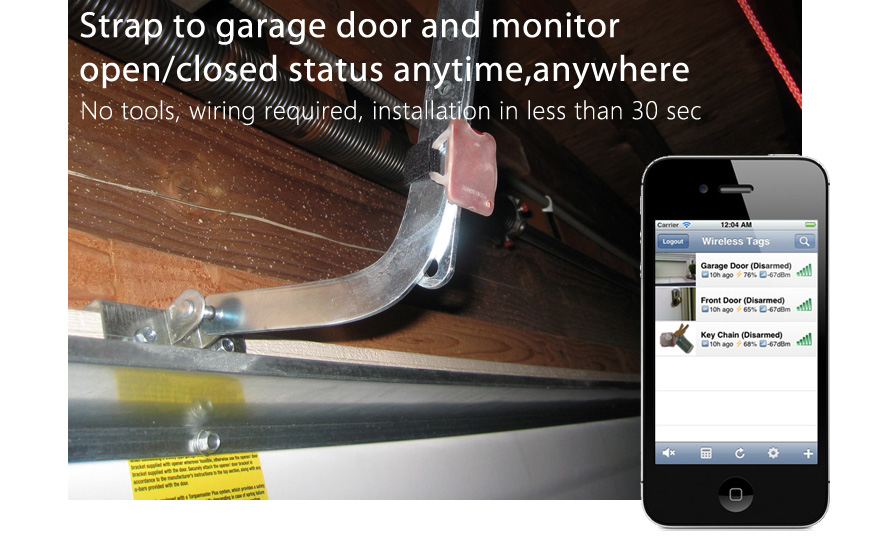
Installation Time
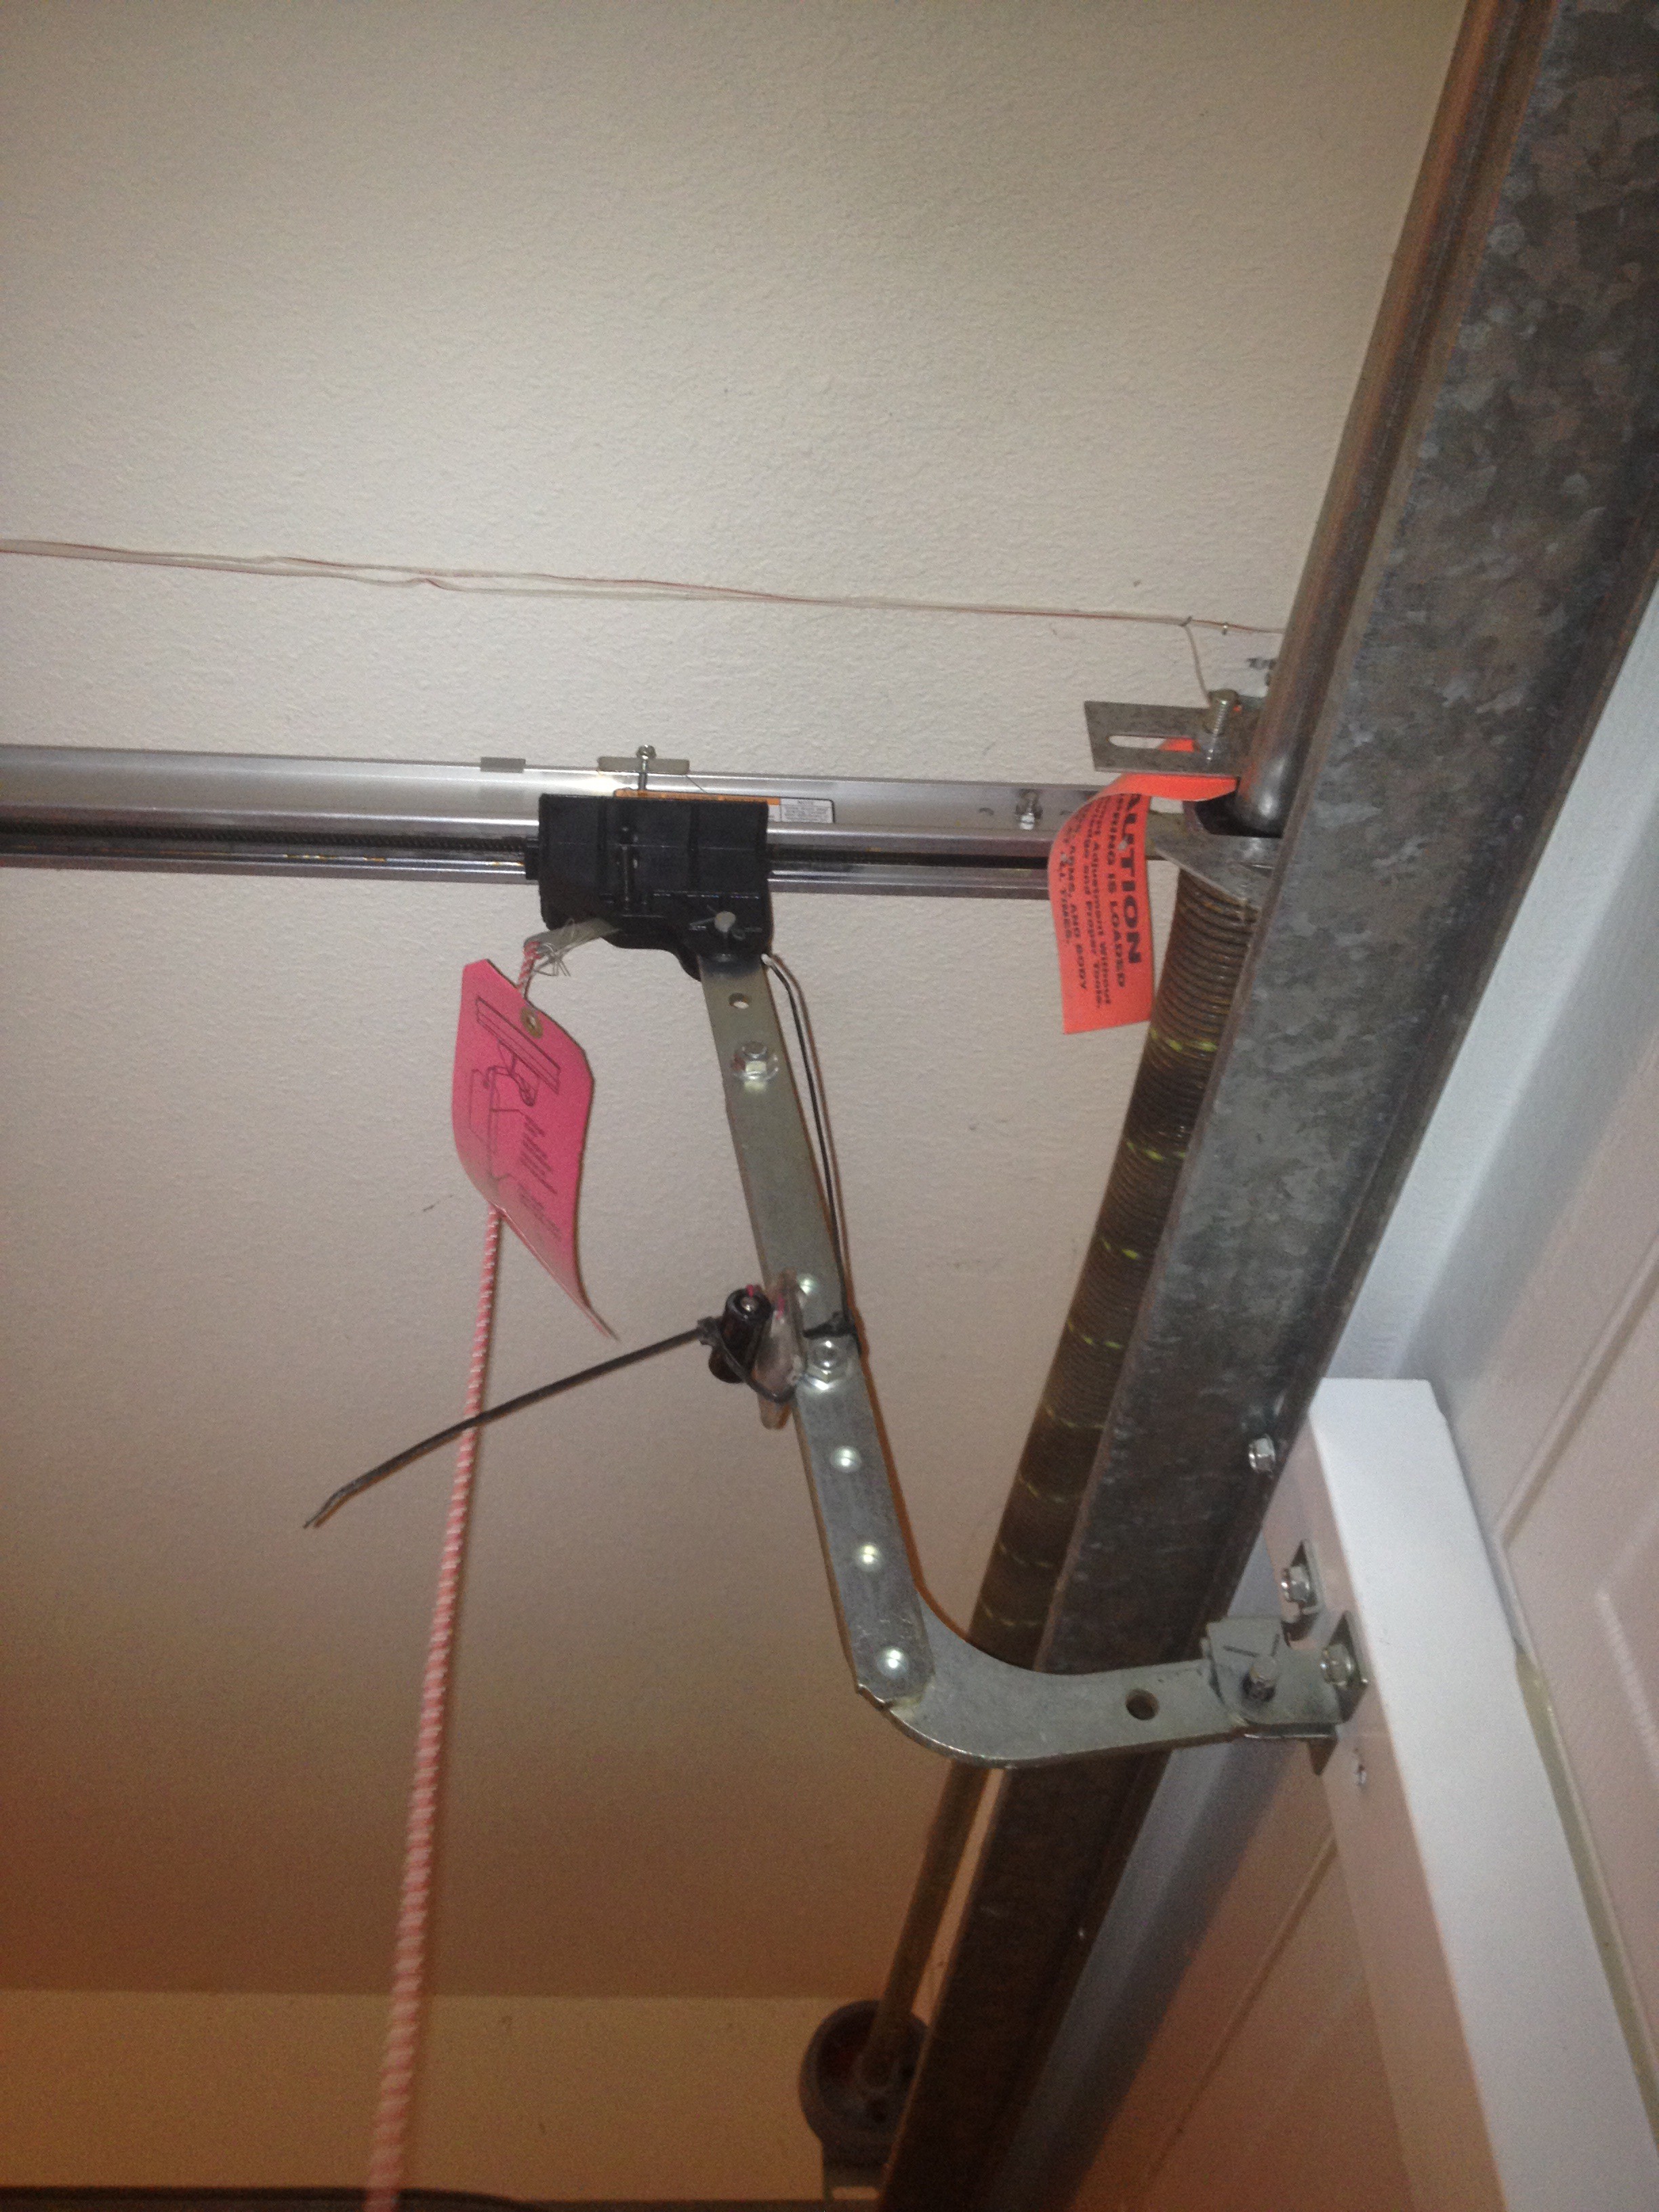
Install these around the house like on the garage opener arm and have real time access to data. Is the garage open or close. Like this…
Now all this is good but if you could only connect the lights and other actions based on conditions of the state of the sensor. Well yes you can connect other things via URL (Json) WOW now the fun begins. My journey in the Home Automation went from installing automation from x10 to UPB switches and controlling from a keypad remote. And an alarm clock to a Automation system built by Cortexa. I liked how the Cortexa was touting an open like system supporting my different subsystems but it all fell through. I assume it stopped when they figured if they locked it down manufactures could be partners. But none the less it was changed and the legacy systems depreciated. I looked into changing over to a windows based automation system but always worried about reliability. Then there was linux but you know linux is a work horse not a show horse. So what to do I love using Macs so the journey for a mac solution to fit my criteria was on. I looked at several solutions and I really liked MacHomeAutomation.com solution XTension. It is awesome and better yet the community is the best.
Ok back to Wireless Tags when I saw them I asked (ok I Begged) it really didn’t take much asking, the lead developer of XTension James Sentman if he could integrate them and yes he did. He ordered some and got it working, the day he said he ordered them I ordered mine in anticipation of all of them working. Boy was I excited that he made them work so fast. And they work via Json so simple to setup and get the data back into the automation program.
Beefy Battery Needed!
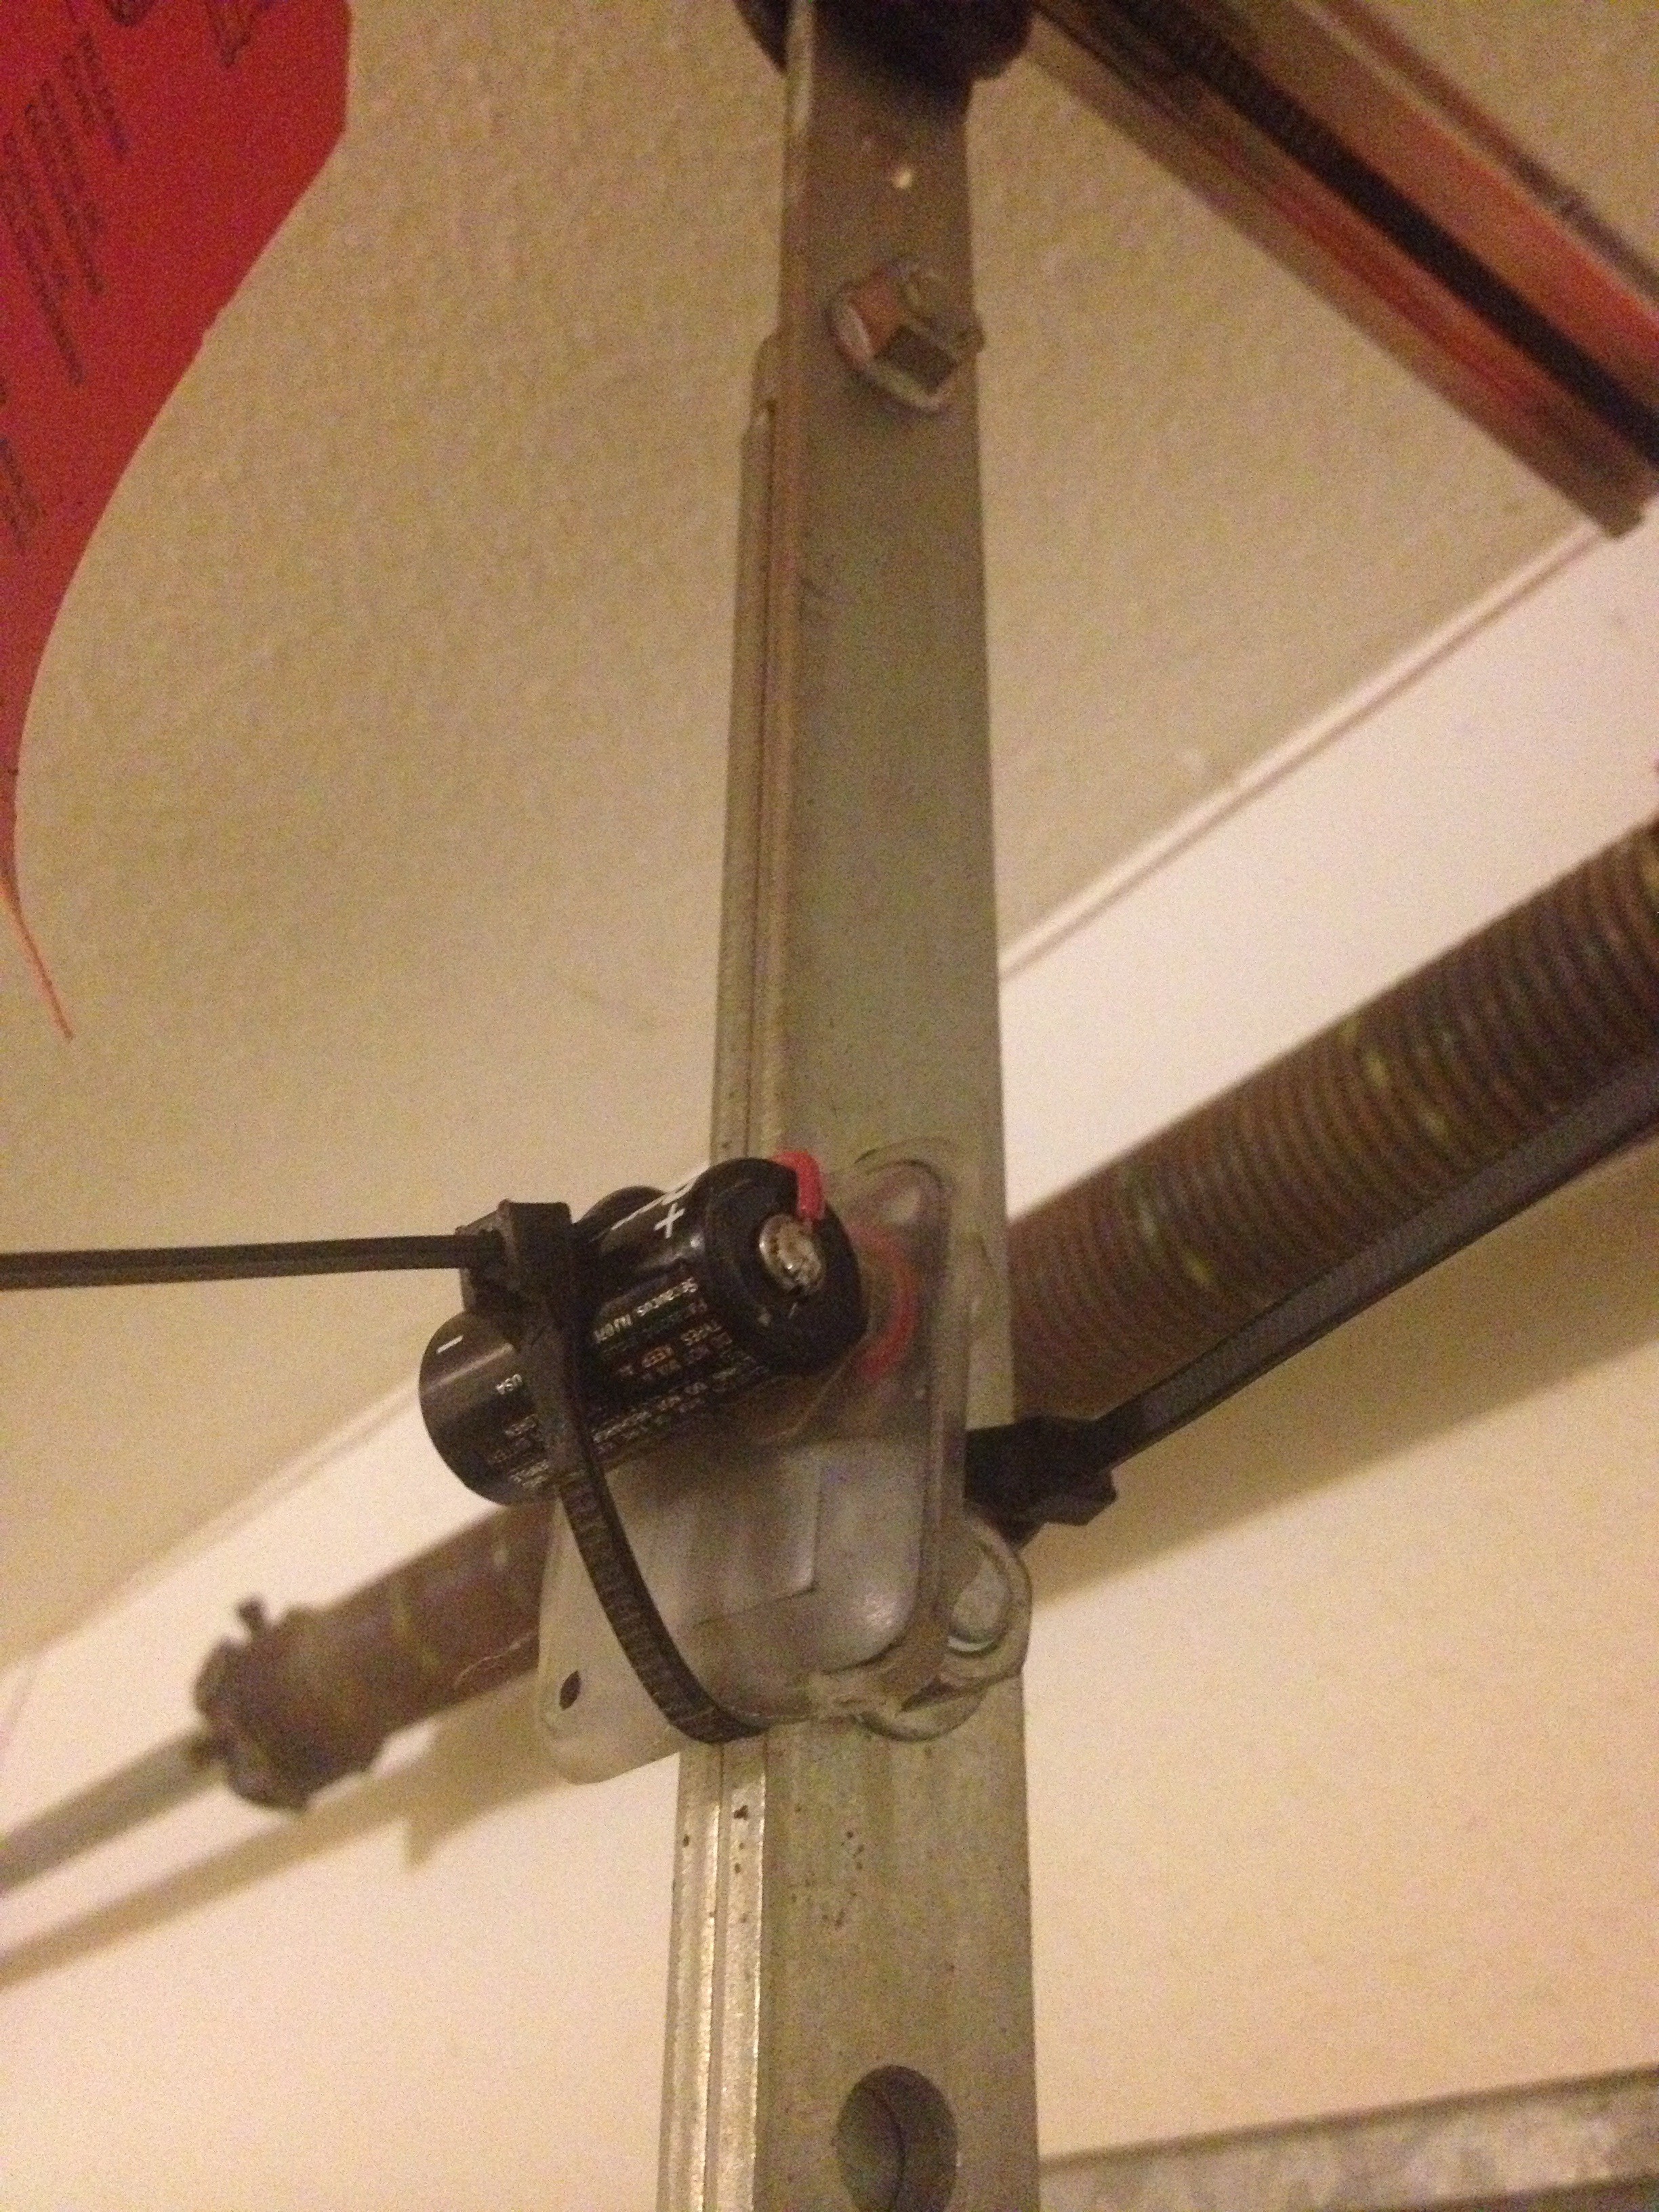
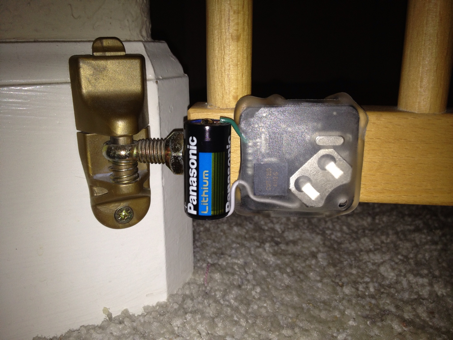
The Wireless Tags use a CR2032 battery the manufactures gives estimated battery life based on setups i.e. how often you poll them and what range they are from the base and what you are using them for. So to gain a longer life I decided to wire a larger mAh battery into the Wireless Tag. I used a CR123a or also known as a 1/2A battery I had a lot of these laying around but no holders for them instead of finding holders @ about $3 I soldered on wires to the battery and wired the batteries to the Wireless Tag.
The key to not ruining the batteries is not over heating when soldering so in order to get the solder to hold sand the contacts on the battery then heat your solder on the iron and drop the solder onto the battery and wire. If reheat is need to flow the solder just be carful not to linger too long!
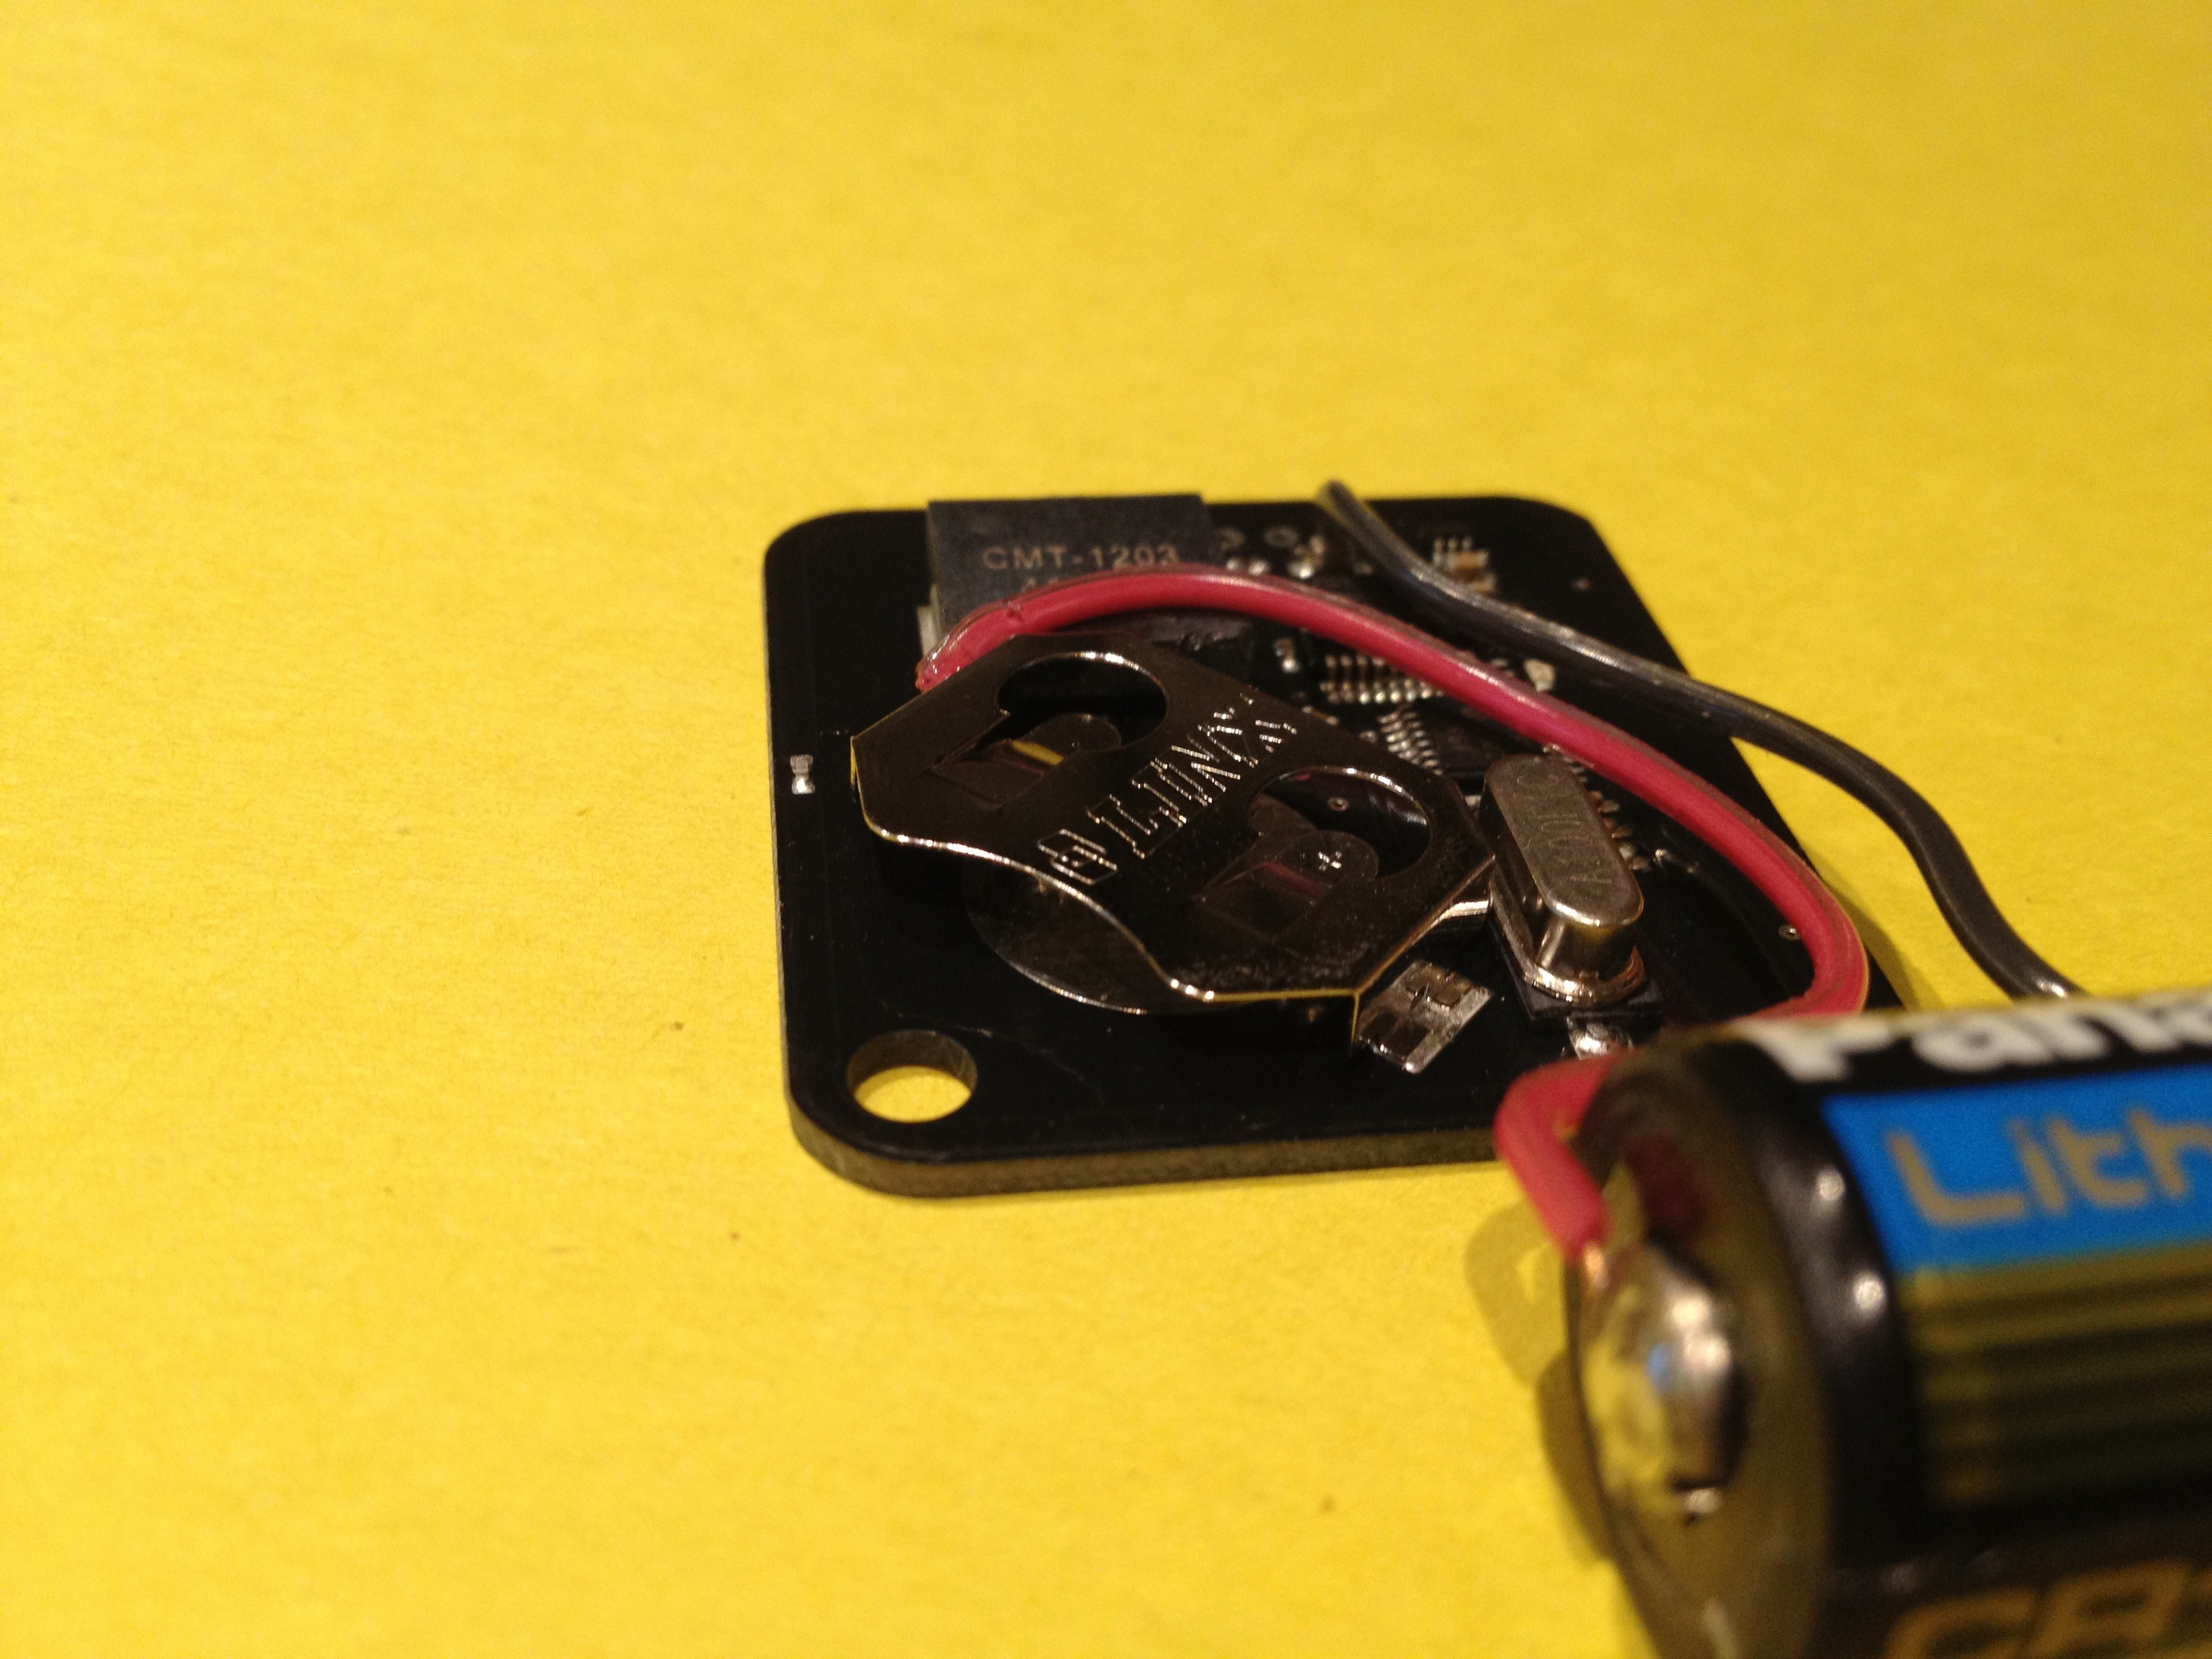
After you solder on the battery leads then solder onto the board. The board has a negative trace and the coin battery is positive up so on the side of the coin battery cage you can pick up + and on the contacts on the base of the Tag the – can be found.
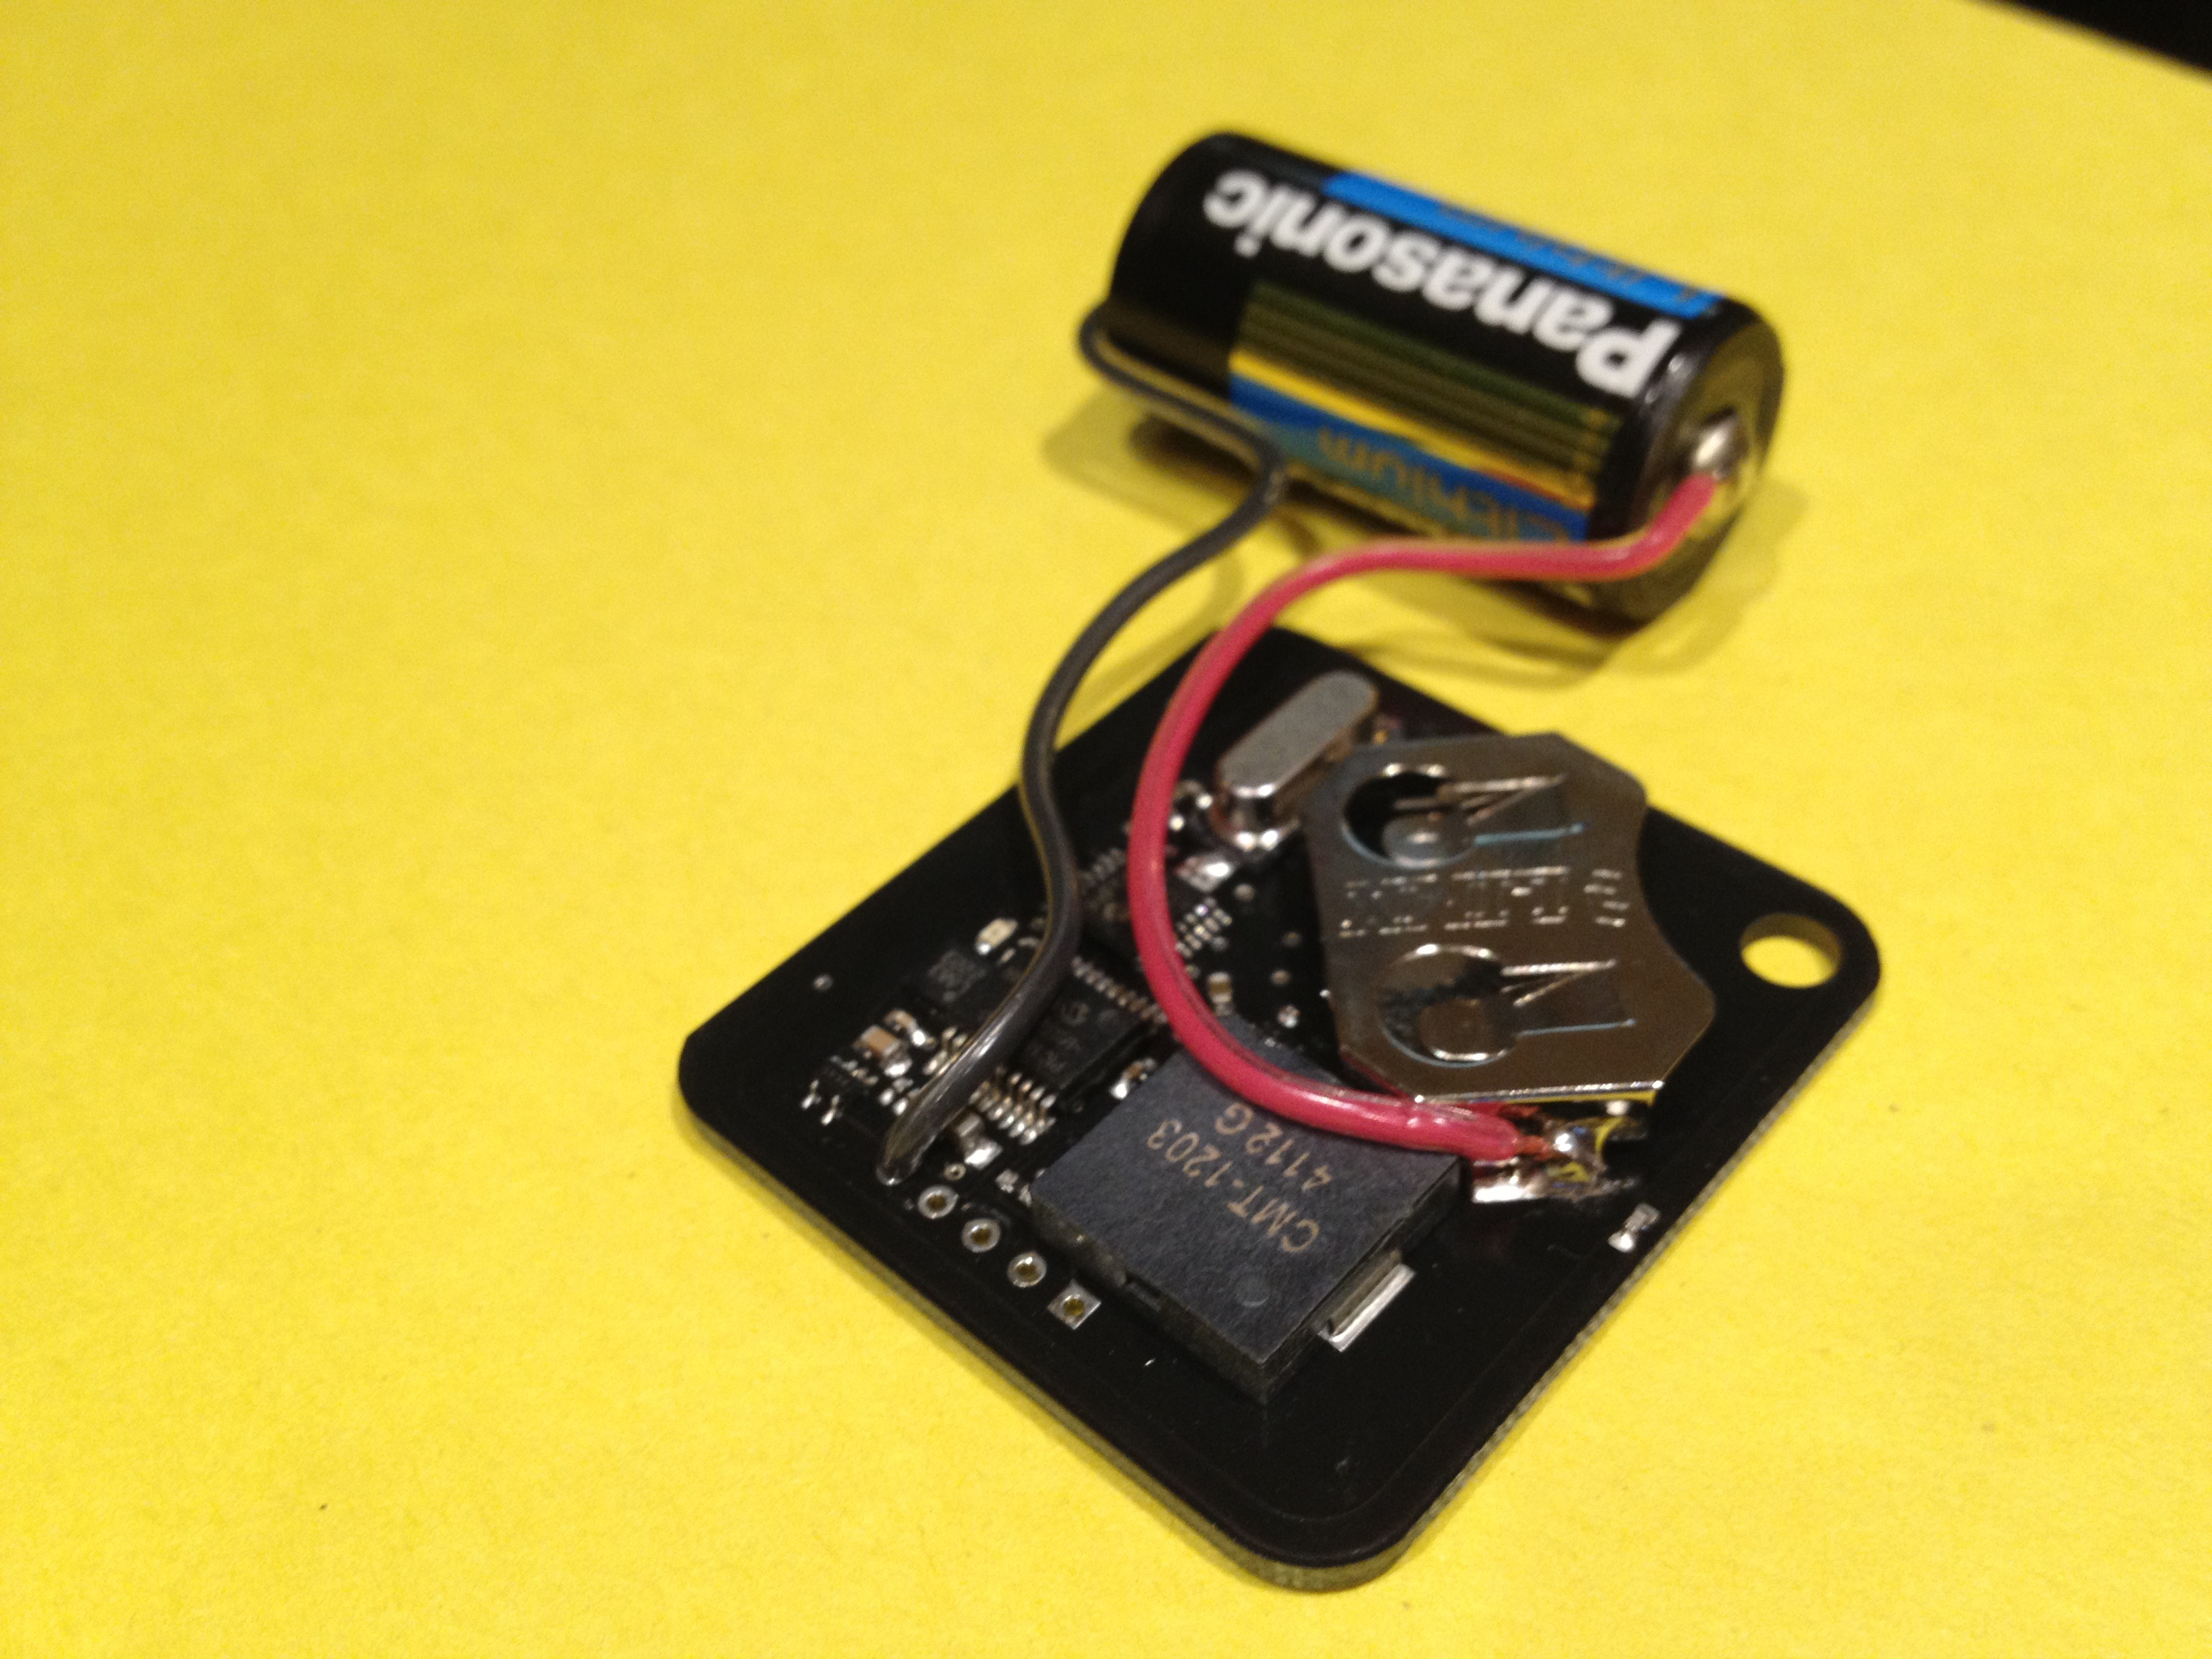
If you are concerned about shorting you could use some hot glue to incase the solder points. What I did is just slip back on the factory cover and zip tied the battery to the board and zipped tied the complete sensor to the garage arm.
Cool I think now I will get a year or better on the battery life!
[battery installed September 26, 2013 @ 3.0v now lets see:) ]
***NOTE if you follow what I have done here I am not responsible for any damage you do to your sensor or yourself and of course not even your house. Have fun but be warned you only have yourself to blame if you mess anything up! ***